October 2008 - Starting work on the new kitchen garden (Part 2)
Having put in the ornamentals, and familiarised ourselves with our new setting in the process, we turned to the vegetable beds. Mrs Mawle had put in vegetables here and there, but there wasn’t really any order – a few leeks at the end of one bed, some Brussels sprouts in the middle of another, a stand of runner beans in the corner of another bed. Self-seeded leeks and chard were everywhere. With the ground being hard to dig, she must have planted in the spots that were easiest to cultivate and left other things to set seed on their own, but if we were going to sort it out then most of it would have to go. Not right away, but before spring.
We were also thinking about what we could put in that would get started over the winter. Garlic and onions seemed obvious and as the raised beds were not cleared, we’d better sort somewhere else out to be going on with.
The best place to start was with what we called the Big Bed, 11m long by about 5.5m wide. Oh my, what a mess - just looking at this bed made me groan. The growth on it wasn’t tall but it was thick and it had everything in it – grass, nettles, thistles, bind weed, fat hen, hollyhocks, wild mallow, Buddleja, brambles, a scattering of Alchemilla mollis, Michaelmas daisies, comfrey and more besides. It had also been used for some years as a scattering ground for grass cuttings, wood ash and the pine needles of discarded Christmas trees. This bed, Mrs Mawle told us, had always been the best spot for growing on. How long ago was that, I wondered? How many decades ago?
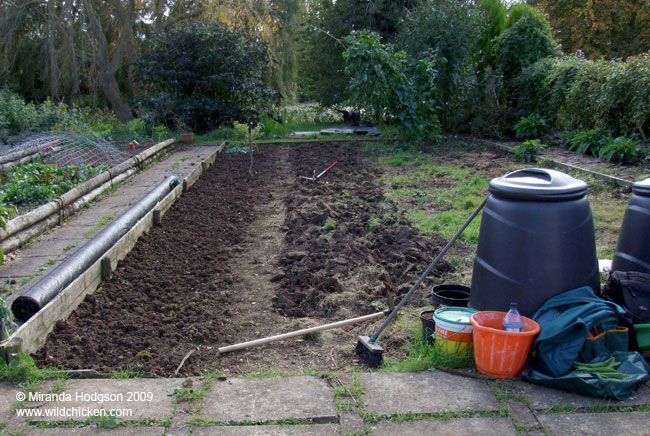
Starting work on the big bed
Oh well, nothing for it but to get started. We cut the weeds back and raked off the piles of grass cuttings, which gave us a bit more of an idea of what was there. I started methodically going through and digging out hollyhocks and tap rooted weeds while Karl dug out the grass and stacked it on the turf pile, which was getting quite big. Then, the mattock came into play again and Karl hacked through the bed a couple of times.
Even after mattocking, the ground was still heavy and very lumpy and using a fork or spade was uncomfortably hard, so we looked around to see what else was available and came across azadas. These are an ancient tool, used by the Romans (them again!) and still used today in many countries, though not in the UK for some reason. They look like a spade but made in an ‘L’ shape, so the blade points towards you when the handle is upright. We ordered one each, a smaller one for me and a larger, heavier one for Karl.
Now at this point, I can imagine people thinking ‘Goodness, why didn’t you just hire a tiller? It would be so much easier!’ Well, because we plain didn’t want to, that’s why. We wanted to do it ourselves. Okay? Right.
So, we tried out the azadas and they worked! Using the weight of the tool and the sharpness of the blade made it a lot easier to break up the ground. You just lifted the handle, aimed it at the bit you wanted to break, let it drop whilst digging in slightly and then pull back. Repeat about a thousand times or until the bed is done.
About the time that the big bed was looking presentable, Mrs Mawle asked for help with getting a big tree stump out from the corner of the garden. It was an old horse chestnut that had died a few years previously, maybe of honey fungus, it wasn’t clear. We didn’t mind helping out; we’d kind of expected this because Mrs Mawle isn’t very big and she’s on her own and, anyway, she wasn’t charging us for the garden and Karl wanted to try out his azada on something else, so she took us over to see where it was.
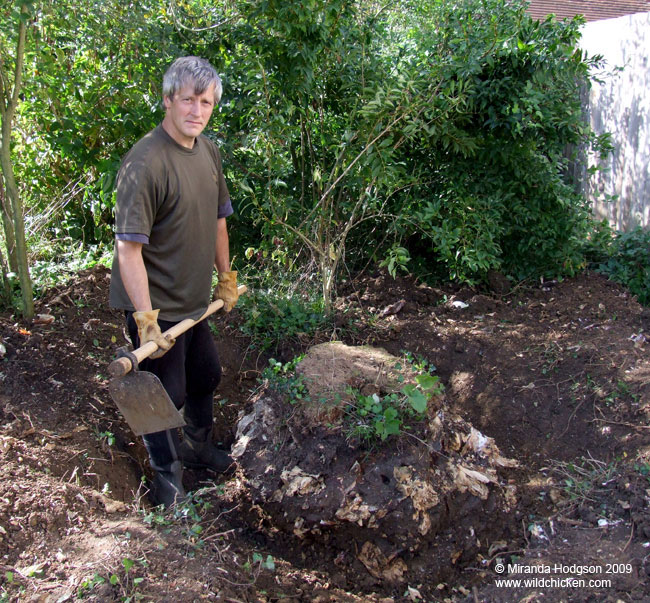
Karl's tree stump
There wasn’t much to see, just a woody lump surrounded by soil. He started chopping at it, pulling the soil away and the stump emerged bit by bit. It was pretty big, obviously a challenge fit for a Karl.
Before he got stuck into that, we needed to strip off the grass from part of the grassy side of the garden so that we could dig out some more garlic and onions beds. We decided to make some long narrow beds in the sunniest spot and stripped off the grass to make them 6m long by 1.2m wide. As expected, the soil was compacted clay and needed the same battering as the ornamental beds, but once it had been worked through a few times it became quite manageable. Karl gave those beds their first mattocking and then I started digging them over while he returned to his stump.
When I saw him next he’d dug a deep trench out round the stump and was standing in it staring at the thick roots that radiated out from the base. The mattock came into play again, then an axe, followed by a bigger axe. Working on it now and then, it took about week to get it out. In the process he found some lesser stag beetle larvae, so we had to quickly make a beetle bucket for them – getting an old bucket, making holes in it, sinking it into the ground and filling it with leaves, wood chips and the pieces of wood with the larvae in. I don’t know if they survived, but I hope they did.
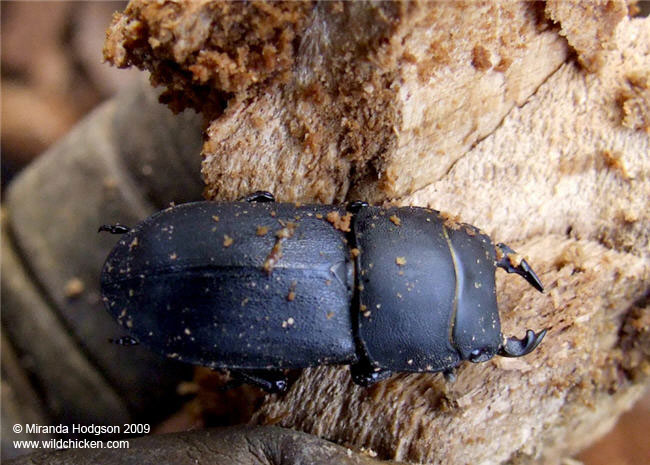
Lesser stag beetle
We found quite a few adults as well, some of them in burrows that they’d tunnelled into the wood. We put them into the pile of roots and wood chips that Karl had built on one side and hoped for the best. The stump we incorporated into the wood pile where it can decompose in peace and the beetles can do what they like in there without being disturbed.
© Copyright Miranda Hodgson 2008