Building a straw bale composting toilet
Part 4 of the Great Composting Toilet Project - the roof
In the previous issue, I detailed the first day of the Great Composting Toilet Project, where we'd got as far as putting up the walls and a temporary roof. Then the thatchers - Matt Williams and Dave Bragg - found themselves inundated with work and so the toilet stood as it was for a few weeks.
Finally, they had some time and we arranged to meet up on a Monday evening to continue with the project. This time they wanted to make a good start on thatching the roof and we would help with the labouring part of it. The idea here wasn't to create a perfect roof, but the type of thatching used to cover traditional hay ricks and something more likely to resemble what a purely functional building might actually have looked like in centuries past. A quick job, but should stand for years. I should say that the roofs they thatch for paying customers are absolutely beautiful, real works of art.
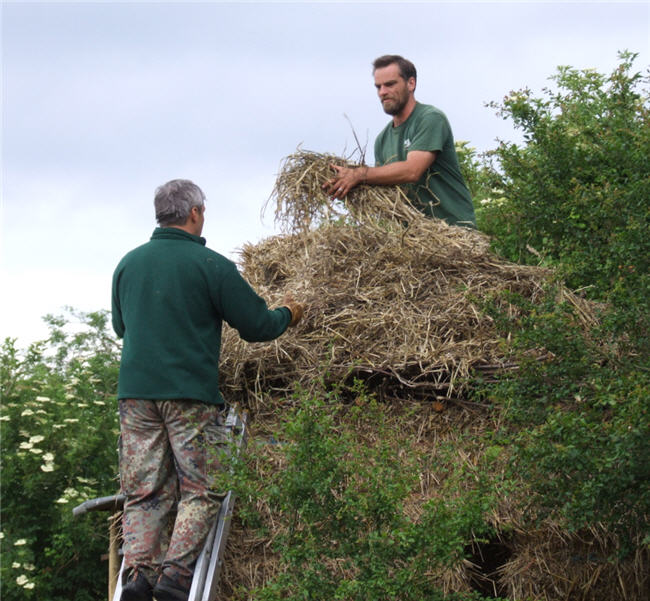
The straw bales that had been stacked on top of the structure were broken apart and spread out over the layer of sticks in a dome shape. This is the base that the thatch will be attached to.
This is how it looked with the straw all spread out.
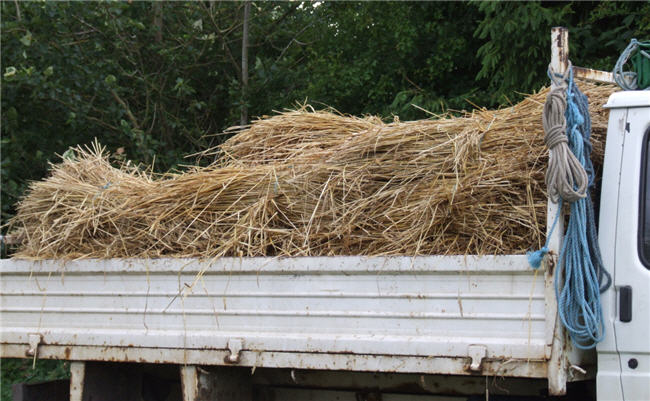
Here are the straw bundles on Matt's wagon. It was on this occasion that we learned some of the strange thatching terminology that they use in the craft. They don't just call these 'bundles of straw', they're called 'yealms', pronounced 'yelm'. A yealm is defined as 'drawn and wet straw ready for laying'.

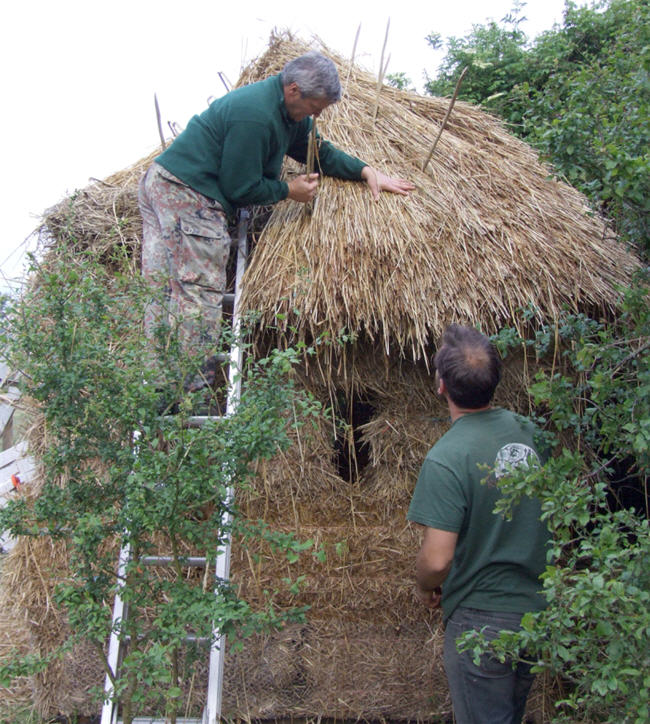
The yealms were attached one third at a time,with the thicker end of the bundle pointing downwards, and held in place temporarily by split and sharpened hazel rods called 'spars'. Before fixing the straw to the roof, the straw is combed through to remove any straggly bits, which would make it less waterproof. It is then vigorously pummeled and pushed until it joins in with the yealm next to it and then pushed and pulled again so that the straw forms a neatly layered slope. This bit reminded me of the hairdresser layering my hair and I did mention it, but no one said anything. Maybe they didn't hear.
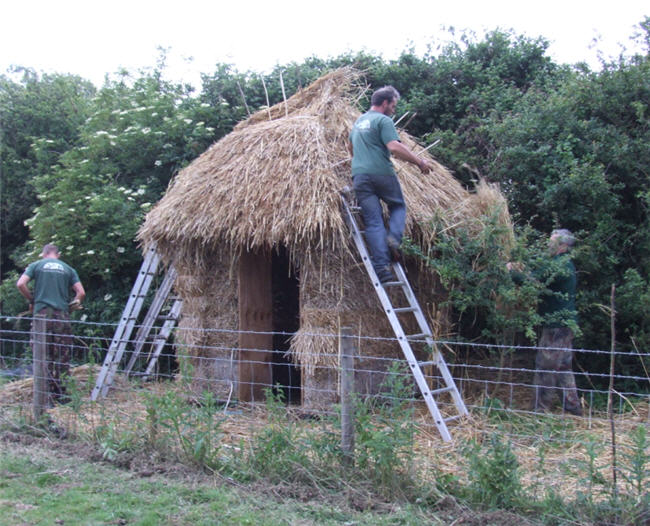
Once satisfied that the straw is in the right position, a length of split hazel, called a 'sway' is laid across the straw and the spars are hammered in, one every two or three inches, to hold it in place. Hammering the spars in hard raises the end of the yealm. Each layer of thatch is called a 'course'. And so it went on - Matt and Dave up the ladders, laying straw, hammering in spars, us down below, passing up yealms and hazel rods, fetching more yealms from the wagon, watching and asking questions.
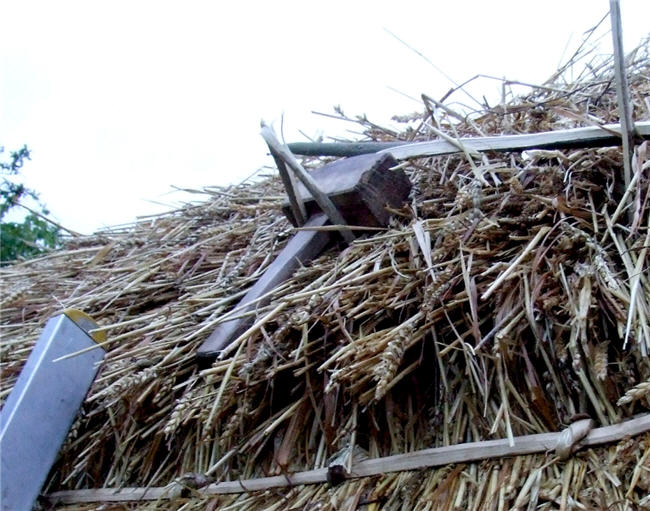
As they worked, I noticed that Matt and Dave made little tool holders from the hazel spars, like this mallet holder...

...and these two spars supporting a bundle of other spars.
We also had a bit of fun when Matt suggested that we each have a go at laying some thatch.
I spent a lot of time taking photographs and video clips, until the camera card filled up and we raced home to download the pictures and raced back again. When we got back, it was nearly 9pm and the light was starting to fade under a lowering sky. The roof was nearly covered in thatch and, while we were away, Matt and Dave had somehow found time for a cup of tea. Seeing their empty mugs, I felt slightly less guilty about the ginger biscuits I'd stuffed in my mouth while waiting for the pictures to download.
Everyone else being busy, while I stand about taking pictures.
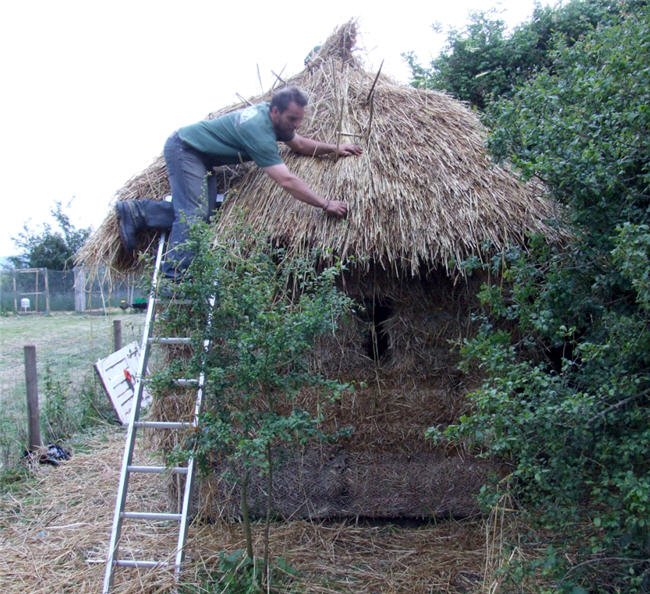
While Matt finished off thatching his side of the roof, Dave had started hammering on horizontal rods, called 'liggers', which hold the lower layers firmly in place. Whether by luck or judgement, he got them to meet when they joined up.
By the time that was done, it was almost 10 o'clock and the light too dim to work in. Still to be done is the top point - called the 'pinnacle' - but this will now have to wait until one evening next week, so I'll stop here and will put up the next page when that's done.
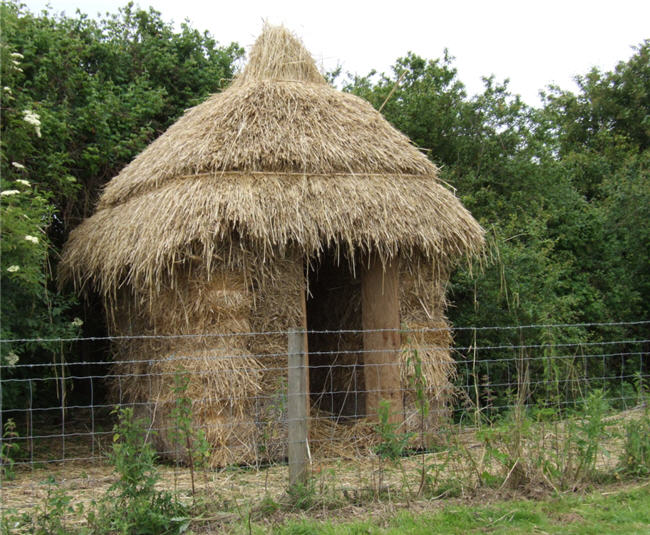
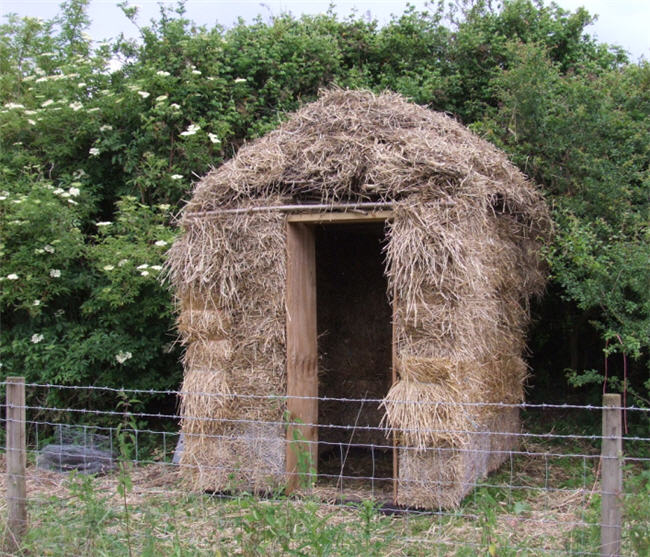
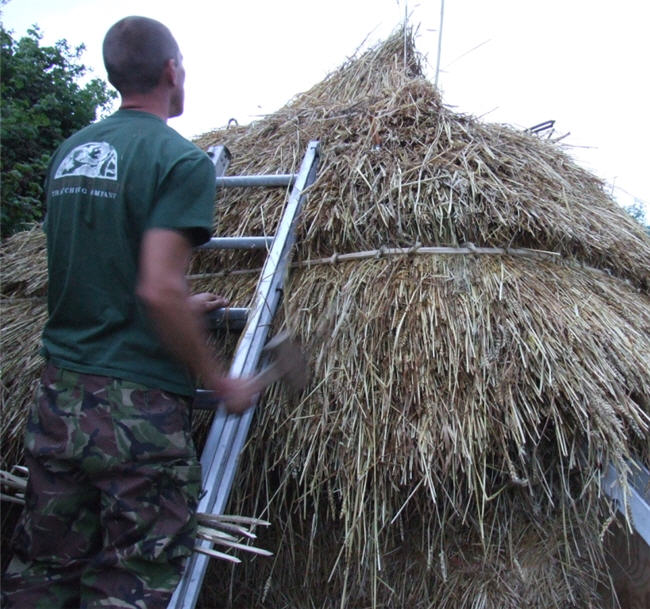
One last picture, taken next day in full daylight. This shows the almost finished roof. Not bad for four and a bit hours work, eh?
Part 1 Part 2 Part 3 Part 4 Part 5
Garden Learning Projects - Overview
© Copyright Miranda Hodgson 2009