How to take Semi-ripe cuttings
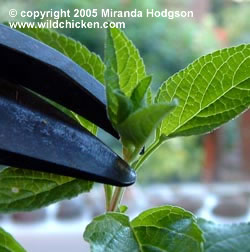
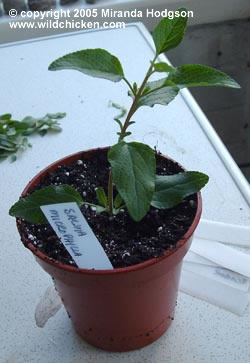
Semi-ripe cuttings are taken during the late summer when growth has slowed and plant stems have become firmer. They are used for deciduous plants that root easily such as Salvia microphylla (pictured) Hebe, Deutzia, Cornus, Philadelphus and Weigela.
Before taking any cuttings it's a good idea to prepare the plant in advance so that it has plenty of strong growth that can be utilised. To do this, cut back the plant quite hard at the start of the dormant season and use the strong new growth which is produced the following year.
When you take a cutting from any plant, first check that it is healthy, free of pests and diseases and is true to type.
Cuttings taken from non-flowering stems will have more of the hormones needed for successful rooting than stems with flowers. If there are flowers or buds on the stem, cut them off as they will be using energy needed for making roots.
Check that your all your equipment is clean and that your secateurs are sharp.
Equipment you will need:
-
Secateurs.
-
Jiffy pellets or small pots containing a mix of compost (70%)
and perlite or sharp sand (30%). Perlite and vermiculite can also be used.
Perlite and sand both improve drainage. -
Plant labels.
-
Cold frame, unheated greenhouse or a bright but unheated room.
A supplementary note on compost.
The old favourite for cuttings and seeds used to be peat, but there are many other materials that can be used. In a recent experiment carried out by the RHS, standard grade perlite and medium grade vermiculite were both found to be successful for encouraging plants to produce strong roots.
Peat-free coir-7 Jiffy pellets were found to be useful for transplanting into.
Method:
Prepare rooting plugs by standing in plug trays and watering. Wait for them to absorb the water and swell to their full size. Drain off any excess.
If using compost/perlite in pots, firm the surface of the compost gently, water and allow excess to drain off.
If plants to be cut are dry, water thoroughly and leave to stand till stems are turgid (firm).
Select stems which are strong and thick in preference to thinner stems.
Ascertain the start of this year’s growth by feeling for the division between soft (this year’s) and woody (last year's) growth. Older growth may be browner and stiffer than this year’s, which will probably be smoother and greener.
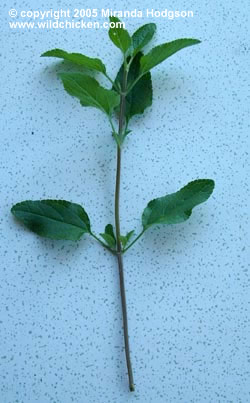
Using the tips, rather than stem sections, cut straight across the stem, taking a piece around 6cm long.
If the stem tip is very soft, remove it, but if it is firm leave it in place.
Remove lower leaves, leaving 3 or 4 sets.
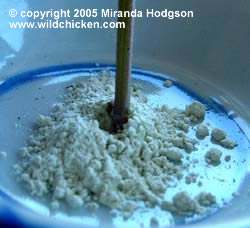
Separate off a little rooting powder/gel into another container to avoid the chance of contamination.
Dip the very end of the stem in rooting powder/gel, knocking off excess.
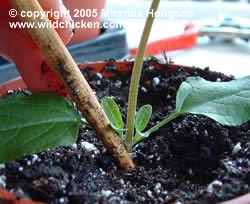
If the stem is very firm you can just push it into the compost. Otherwise use a 'dibber', which is basically a stick for making a straight hole.
Tip: a disposable chop stick makes a good dibber.
Push the cut end gently but firmly into centre of the moist compost plug, as far as it will go, and ensure compost is firm around base of stem.
Label the pot.
Tip: if you don't have any labels, you can cut labels out of old plastic milk cartons.
Black CD markers make good label pens as the ink tends not to fade.
After care:
As the cuttings will continue to lose water through their leaves, ensure that they don't dry out, but be careful not to over water or they will rot. Keeping them in a ventilated propagator, or cold frame, with the bottom lined with damp sharp sand will help them to retain moisture.
As semi-ripe cuttings are generally deciduous, the leaves will drop. Remove all fallen leaves from compost at the base of the cutting so that they don't rot.
Leave the cuttings in a light, warm situation, out of direct sunlight and with bottom, heat till rooted. Rooting generally takes around 4-8 weeks, but will depend on temperature. If temperatures are low, it may not occur till late winter or the following spring.
Once the cuttings have rooted, leave them in situ for the following growing season, feeding and watering regularly. When the leaves have dropped, lift and transplant them.